Event
Events, notices and school-calendar entries.
An event is one entry on the school's timeline: a sports day, a parent meeting, a holiday or a notice. Each event belongs to an event type, and the type decides which fields the form shows and how the list looks.
In the sidebar you will see one link per type, for example Event, Notice and School Calendar. Each link opens the list for that type. This guide uses the Event type for the table list and School Calendar for the calendar list.
The list page (table view)
Open Event Management → Event (or Notice) in the sidebar.
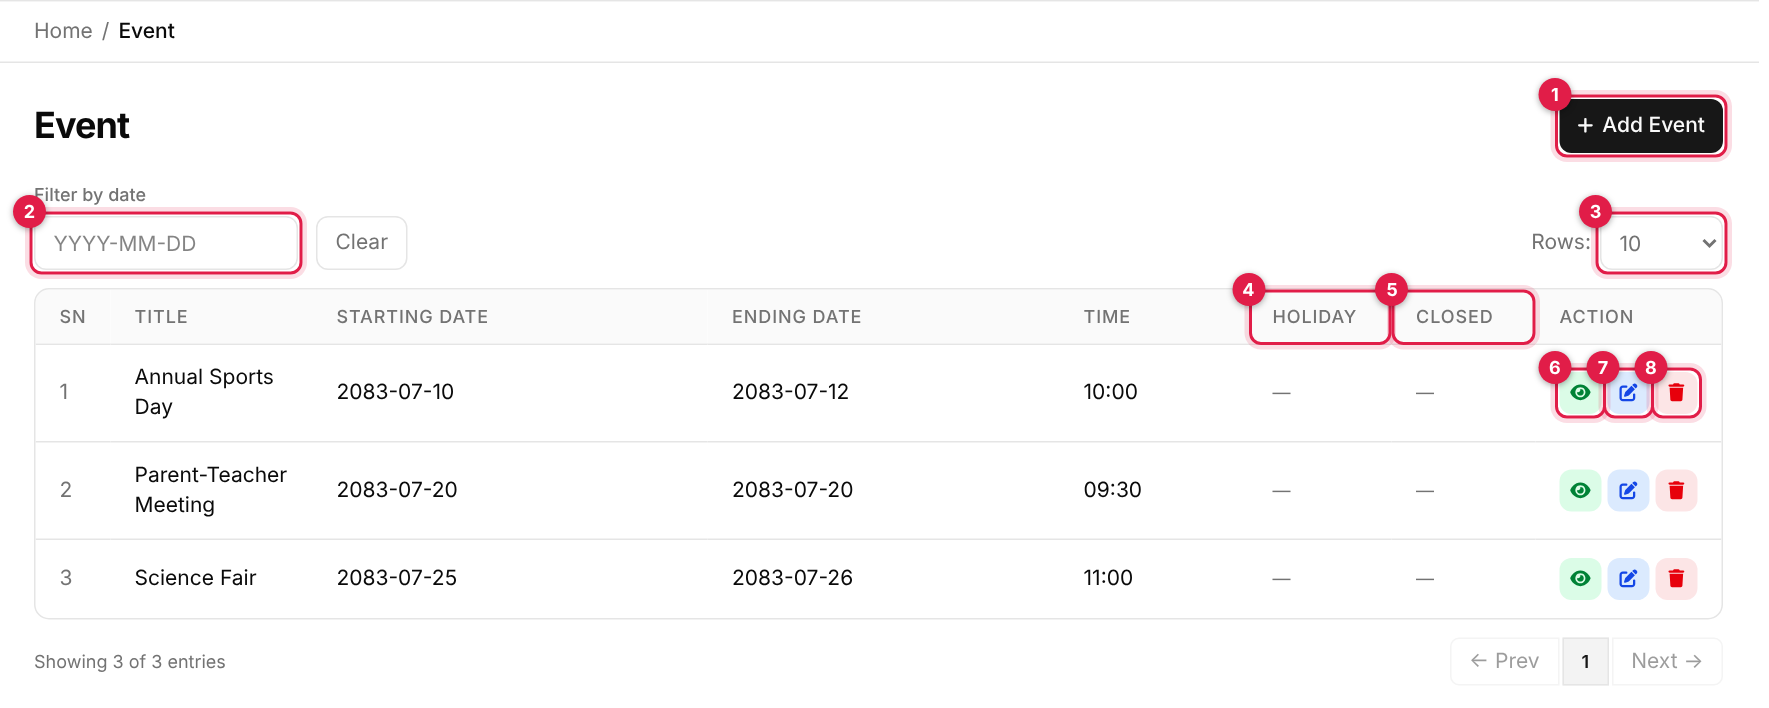
- 1Add Event opens the add form with this type already selected.
- 2Filter by date: pick a date to see only events that cover it. Use Clear to show everything again.
- 3Rows: 10, 20, 50 or 100 per page. Page buttons are under the table.
- 4Holiday: shows an orange Holiday badge when the event's activity marks it as a holiday, otherwise a dash.
- 5Closed: shows a red Closed badge when school is closed that day, otherwise a dash.
- 6View (eye) opens the event's detail page.
- 7Edit (pencil).
- 8Delete (red bin).
Columns
The list page (calendar view)
Types whose View is set to Calendar (such as School Calendar) show a month grid instead of a table.
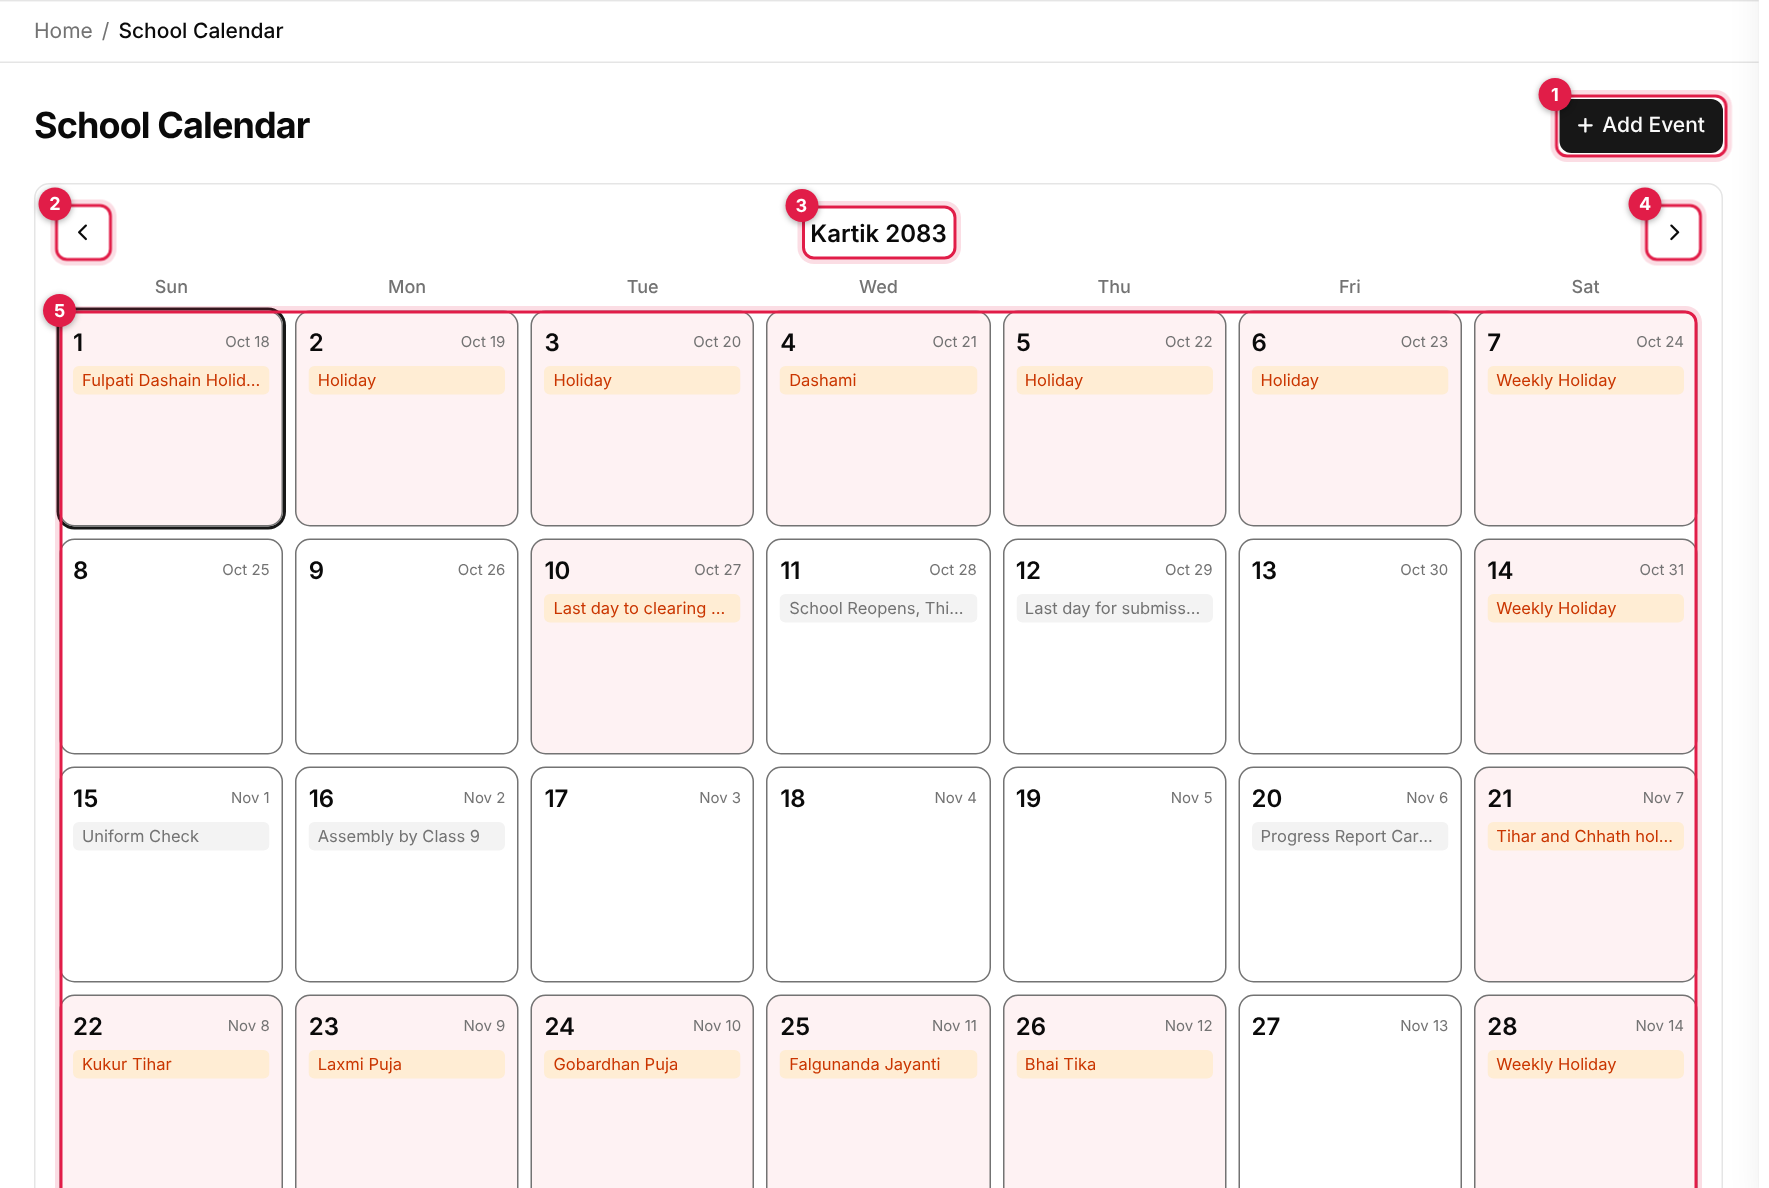
- 1Add Event.
- 2Previous month.
- 3Month and year in Nepali, for example Kartik 2083.
- 4Next month.
- 5The grid. Each day shows the Nepali date, the English date and the first few event titles (with +N more if there are more). Holiday days are tinted red.
Click a day to open its panel on the right:
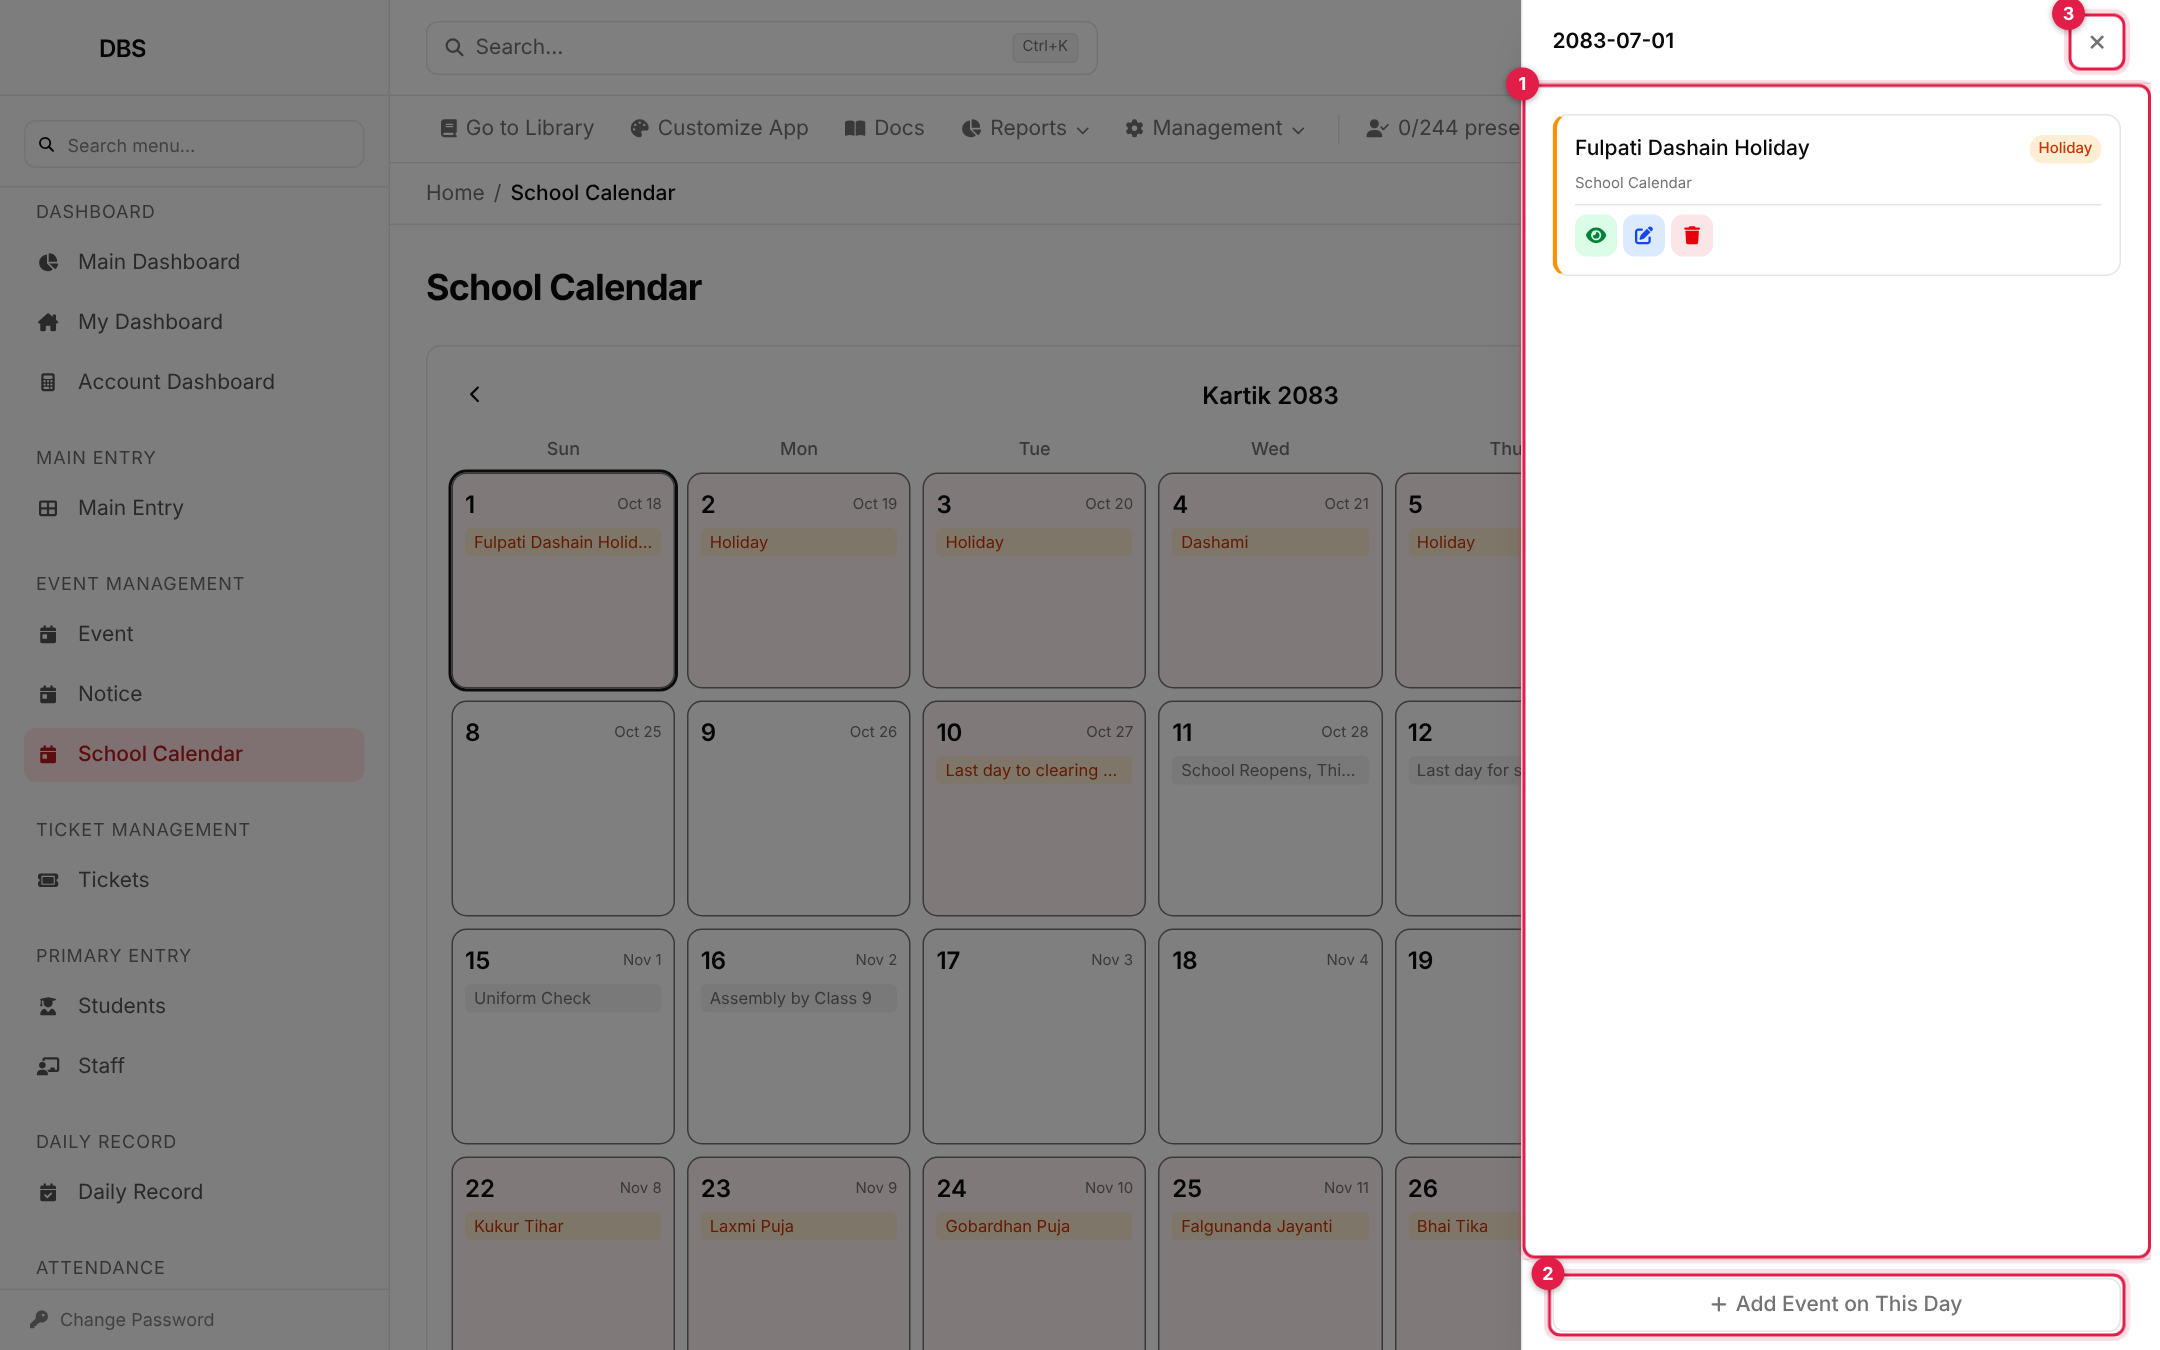
- 1The day's events. Each card shows the title, its activity badge and its type, with a coloured edge for priority, and the view, edit and delete icons.
- 2Add Event on This Day opens the add form with the Starting Date already filled in.
- 3Close the panel.
Add an event
-
1
Open the form
Click Add Event. For a calendar-view type you can instead click a day and choose Add Event on This Day. -
2
Fill in the details
The form is a full page. Which fields appear depends on the event type chosen in field 3; the screenshot shows the Event type.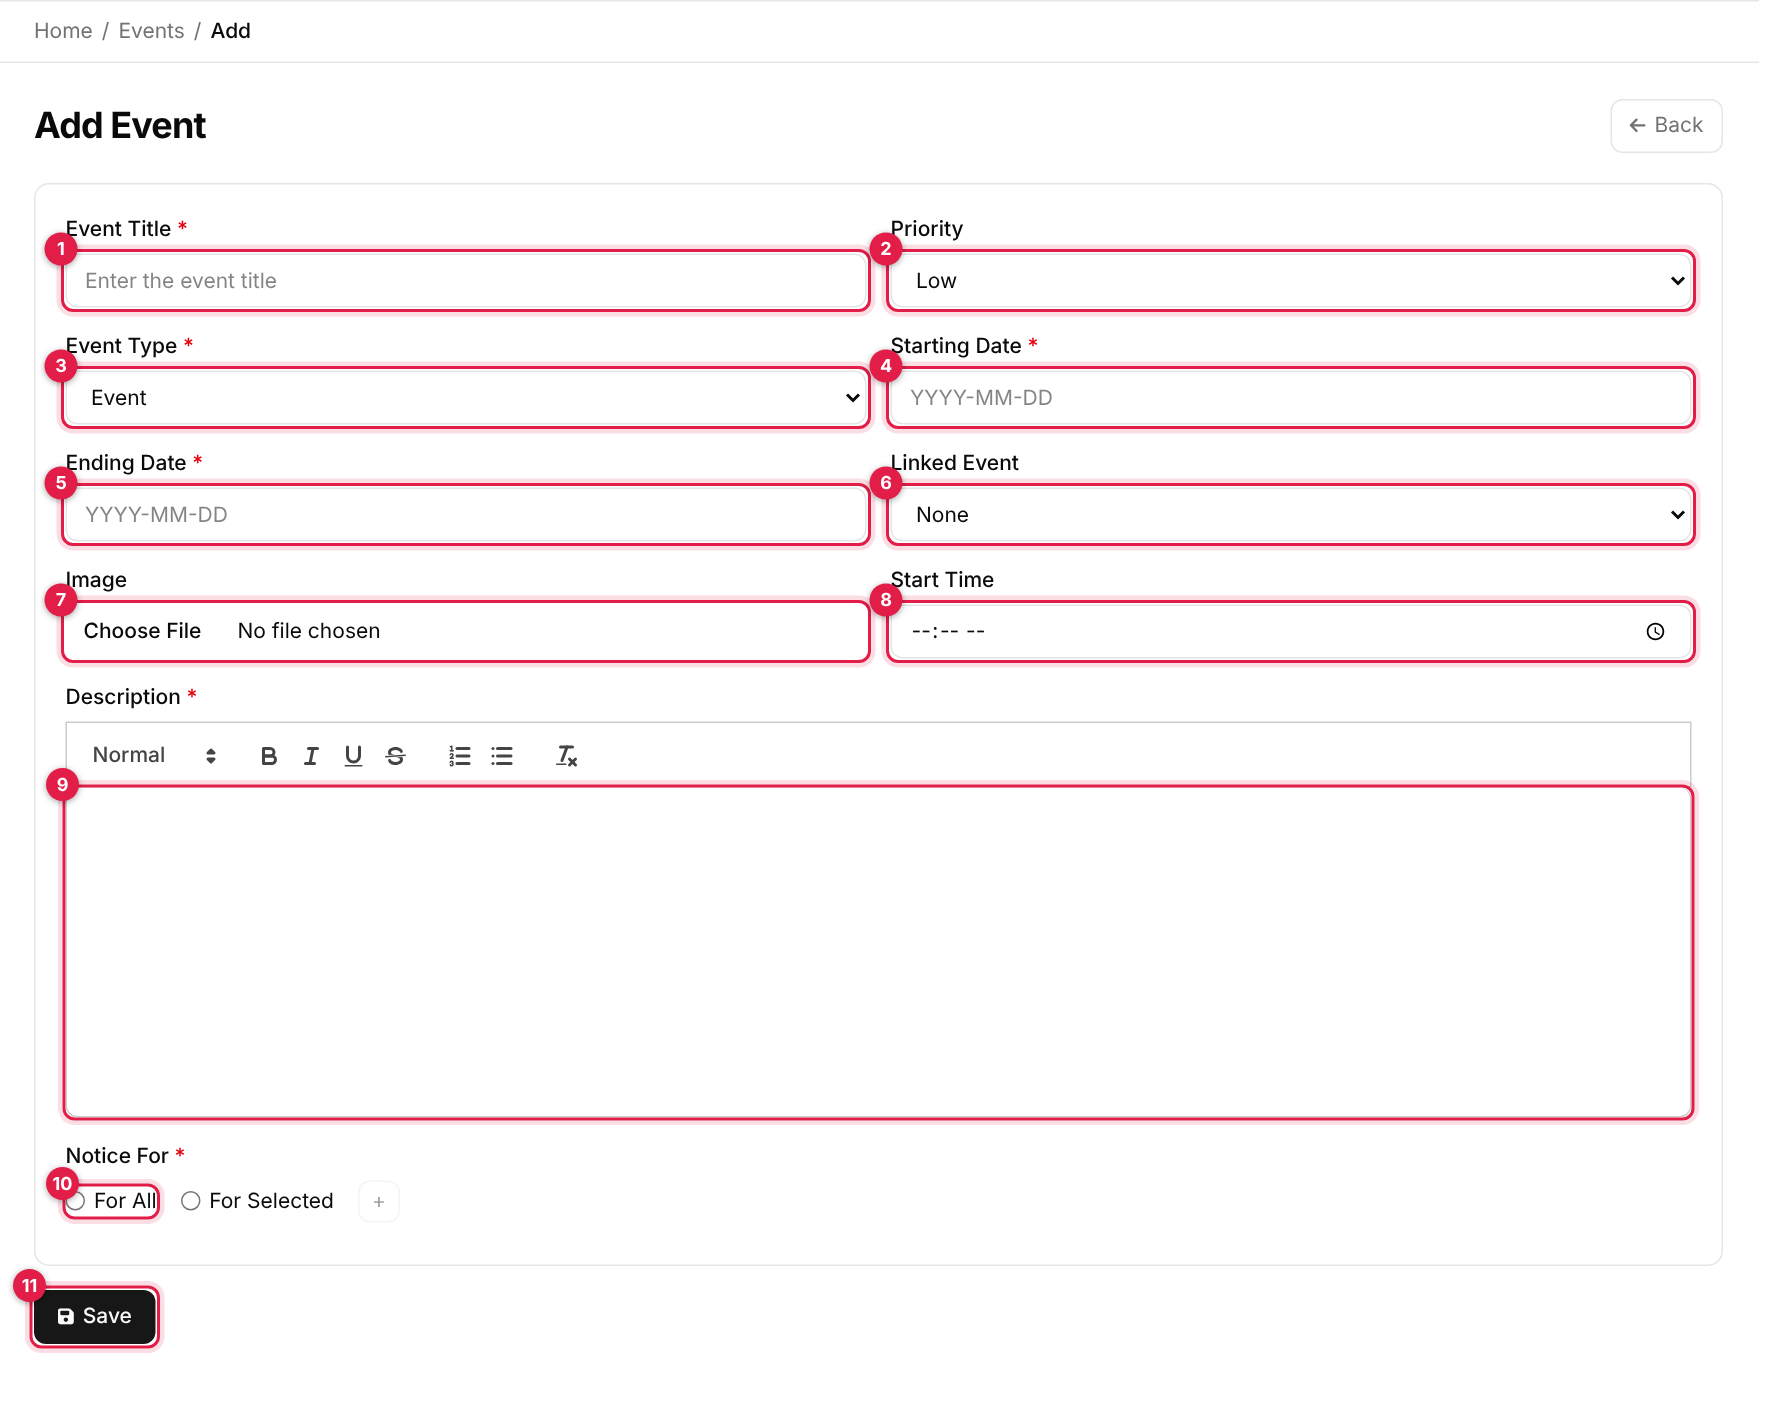
The Add Event form (type: Event) # Field Required What to enter 1 Event Title Yes A short, clear name, for example Annual Sports Day.2 Priority No Low (default), Medium or High. It sets the colour of the event on the calendar. 3 Event Type Yes The category. Changing it changes which of the other fields are shown. 4 Starting Date Yes Nepali date, YYYY-MM-DD. Click the field and pick from the date picker.5 Ending Date Types with End Date The last day. For a one-day event use the same date as the start. 6 Linked Event No Connect this event to another one, for example a rescheduled event to the original. None by default. 7 Image No A JPG or PNG up to 4 MB, shown on cards and the detail page. Only on types with Image. 8 Start Time No The time the event begins. 9 Description Types with Description Details of the event, written in the text editor (headings, bold, italics, lists). 10 Notice For Yes (when adding) For All or For Selected. See the note below. Callout 11 is the Save button. Types that use Activity show an extra Activity dropdown (for example Holiday), and the Notice type shows a PDF field (up to 8 MB) in place of Image.
-
3
Choose who it is for
Under Notice For pick For All, or For Selected and press the + button to add rows. In each row choose a Shift and then a Class. Use − to remove a row. -
4
Save
Click Save. You see Data added successfully!.
Known issue: notice audience
- Notice For is saved with the event but this form does not send an SMS or push message to anyone.
Dates
YYYY-MM-DD (for example 2083-07-10). The form does not check that the end date is after the start date, so look it over before saving.View an event
Click the eye icon (callout 6) to open the event's detail page.
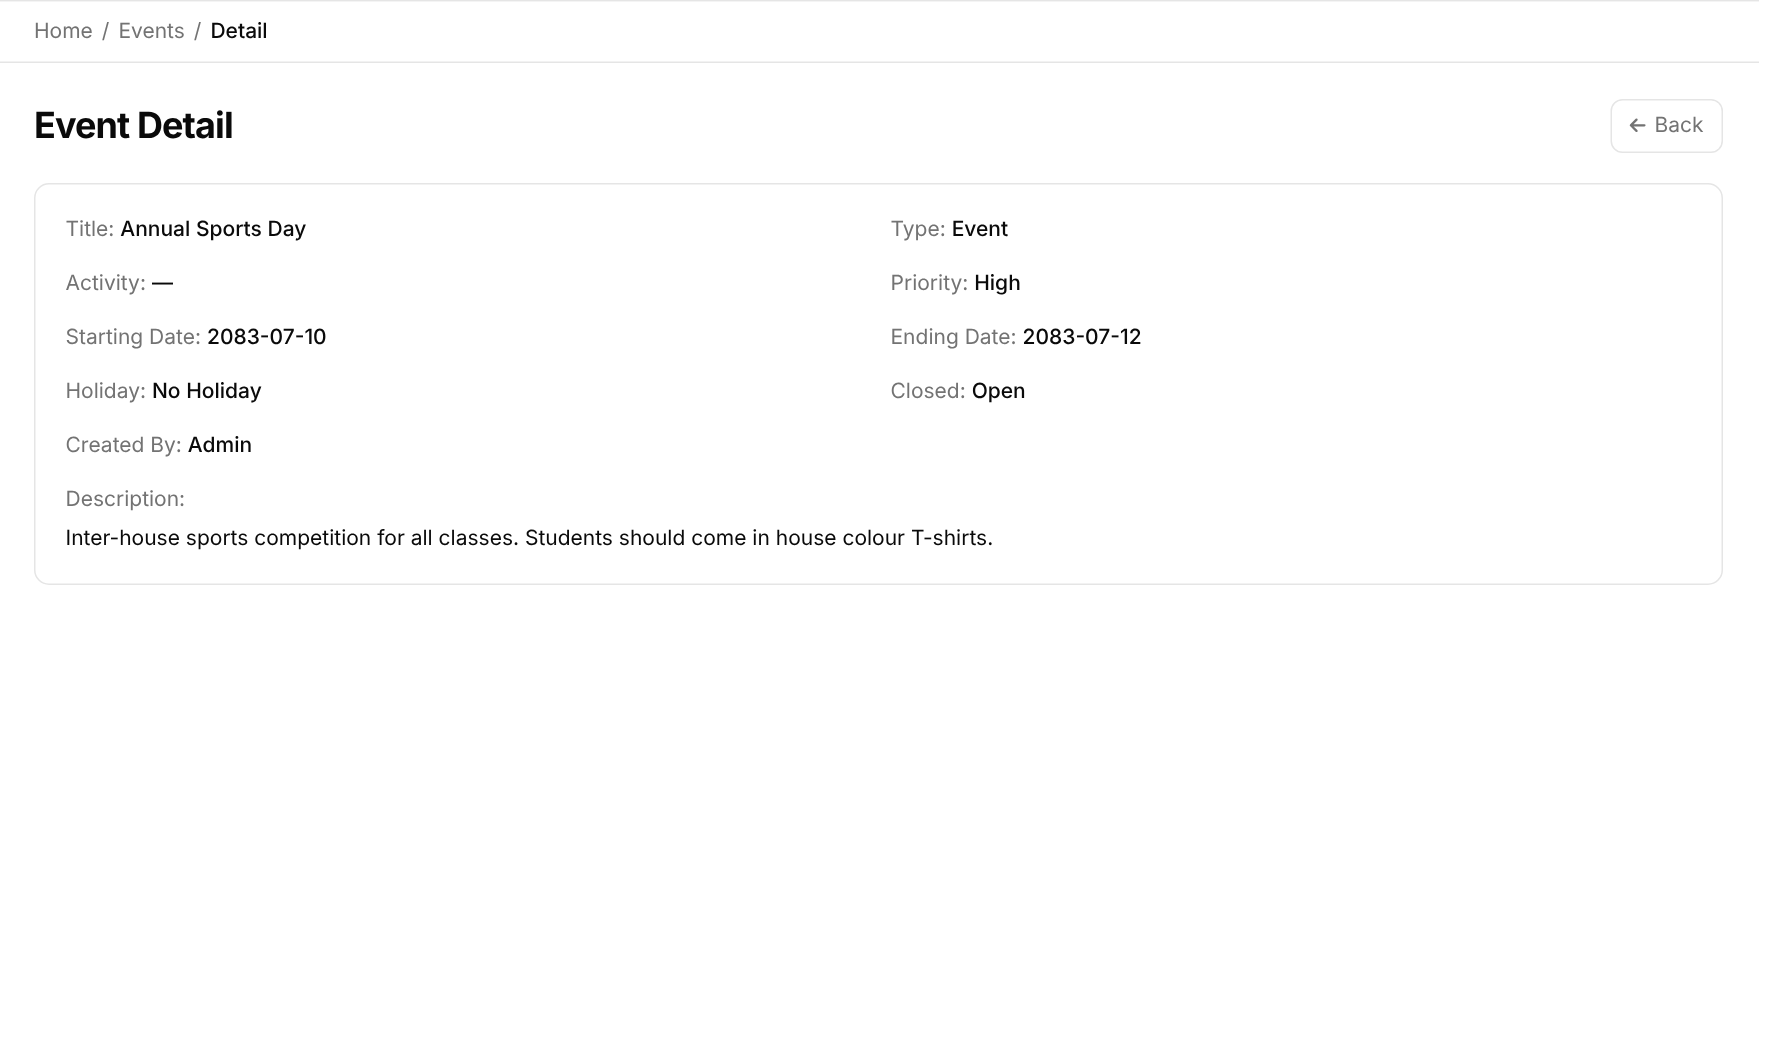
It shows the title, type, activity, priority, both dates, whether it is a holiday and whether school is closed, who created it, and the description. If the event has an image, a PDF or a linked event, those appear below with links. Back returns to the list.
Edit an event
-
1
Open it
Click the pencil on the row, or on the event's card in the day panel. -
2
Change and update
The same form opens with the current values. To drop an image or PDF tick its Remove box. Click Update to save (Data updated successfully!). The audience (Notice For) is not shown when editing.
Delete an event
-
1
Click the bin
Use the red bin on the row or on the event's card in the day panel. -
2
Confirm
Confirm when asked. The event, and any image or PDF attached to it, is removed.
Deleting is permanent
Messages you may see
| Message | What it means |
|---|---|
| Data added successfully! | The event was created. |
| Data updated successfully! | Your changes were saved. |
| Data deleted successfully! | The event was removed. |
| Data could not be updated! / Data could not be deleted! | The change was refused. Refresh the page and try again. |
| Red text under a field | A required field is empty, or a file is the wrong type or too large (image: JPG/PNG up to 4 MB; PDF up to 8 MB). |