Class
Grade levels and classes, and the hub for shifts, sections and subjects.
A class is a grade level such as 1 to 12, or Nursery. The class is where you connect shifts, sections and subjects, and everything about students, exams, homework and fees hangs off it.
Where it is used
- Student enrolment
- Exams, marks and homework
- Fees and routines
Before you start
- Create Shifts and Sections first, because you attach them to each class.
- Check the Running Class school setting (Settings), which caps the highest class number you can add.
The list page
Open Main Entry → Class from the sidebar, or click the Class card on the Main Entry dashboard.
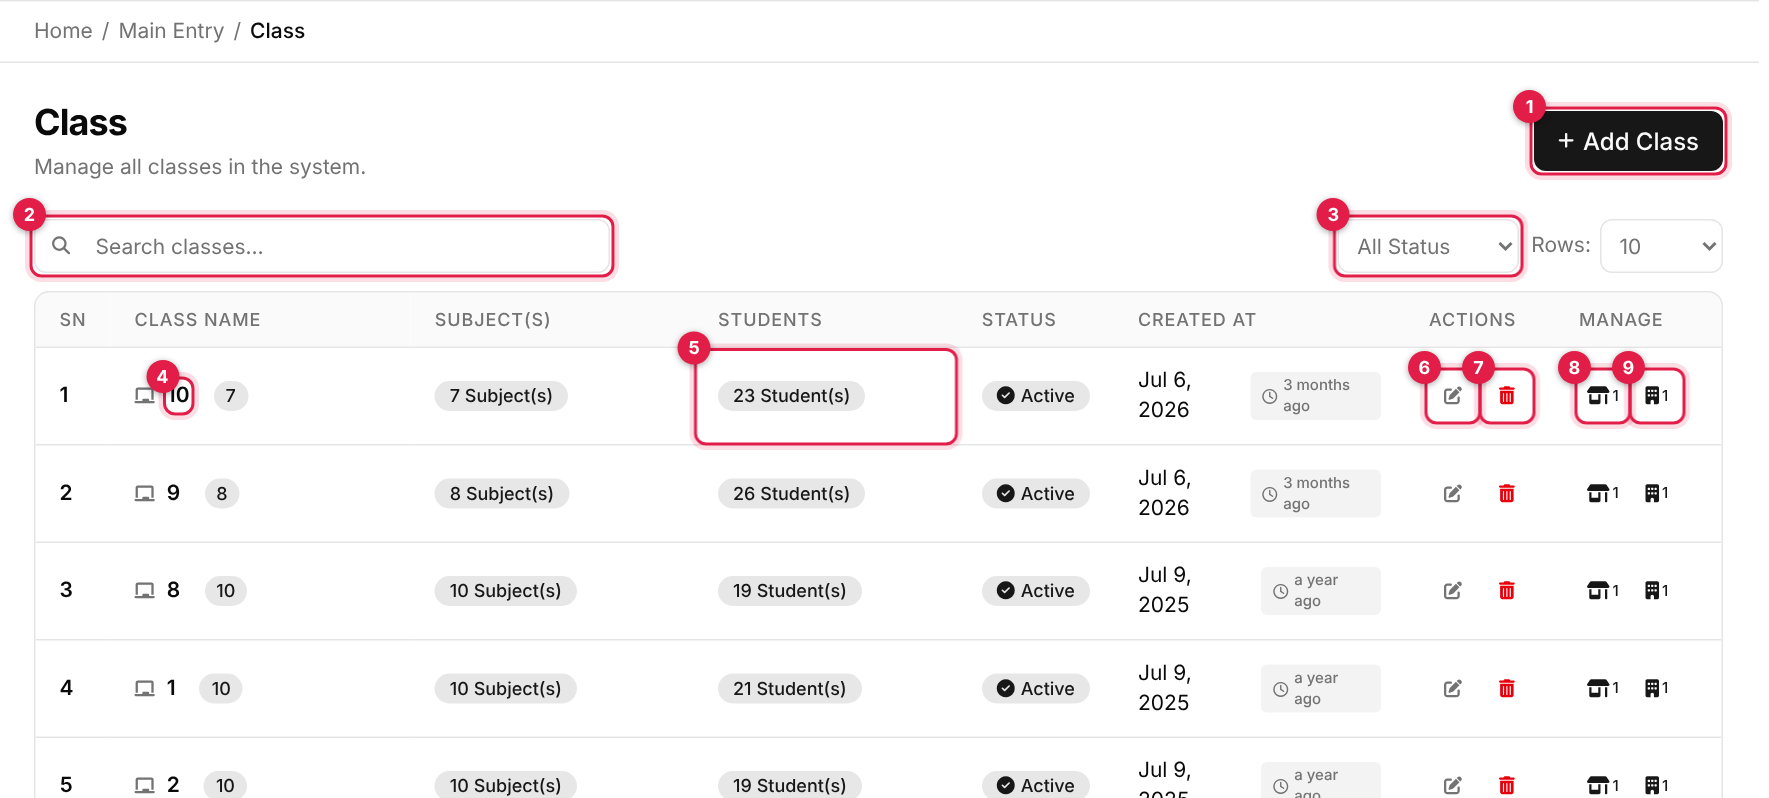
- 1Add Class opens the form.
- 2Search filters by class name.
- 3Status filter: Active or Inactive.
- 4Class name link (with a subject-count badge) opens that class's subjects.
- 5Students: active students of the current batch in this class.
- 6Edit (pencil).
- 7Delete (red bin).
- 8Manage Shift: attach shifts to the class (number = shifts attached).
- 9Manage Section: attach sections to the class (number = sections attached).
| Column | Shows |
|---|---|
| SN | Row number on the current page. |
| Class Name | Class name; click it to manage the class's subjects. |
| Subject(s) | How many subjects are assigned to the class. |
| Students | Active students of the current batch. |
| Status | Active or Inactive. |
| Created At | The date it was added. |
| Actions | Edit and delete. |
| Manage | Shortcuts to the shift and section pages (visible with the manage permission). |
Add a class
-
1
Open the form
Click Add Class (callout 1 above). A panel slides in from the right. -
2
Fill in the details
Complete the fields below. The numbers match the callouts in the screenshot.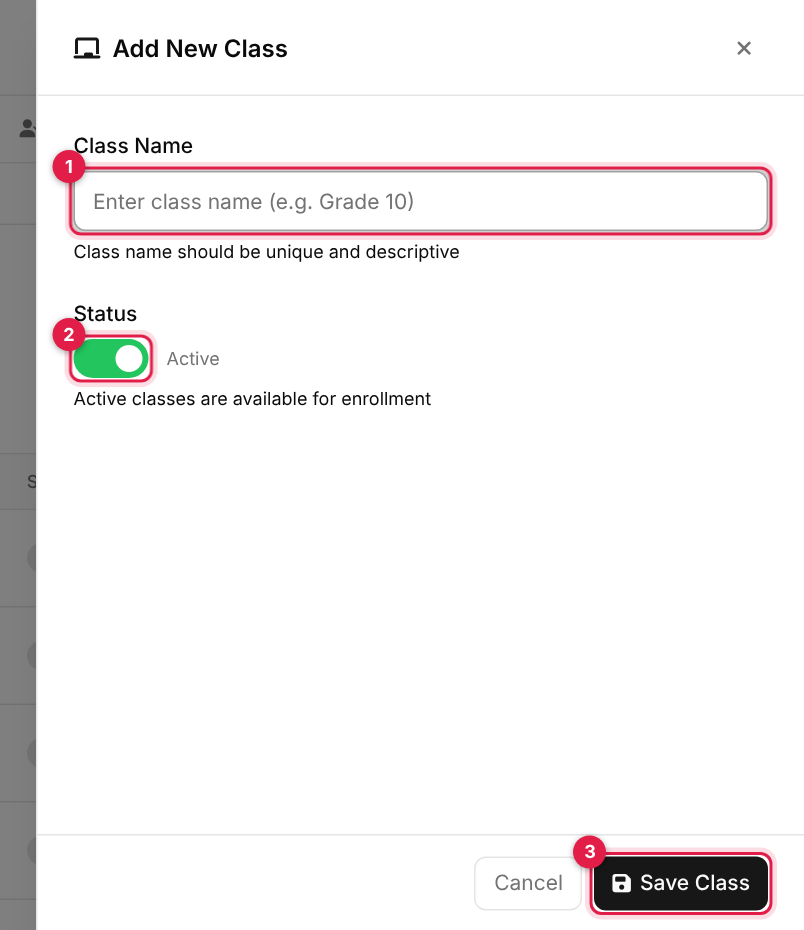
The add form for class # Field Required What to enter 1 Class Name Yes For example Grade 10or10. Text names such as Nursery are saved in lowercase.2 Status No On (default) = available for enrolment. -
3
Save
Click Save Class (the last callout). On success the panel closes, the list refreshes and a green Success message appears. If something is wrong, a red Error message lists the problems and the panel stays open so you can fix them. Cancel, the × or a click outside the panel closes it without saving.
Edit class
-
1
Open the record
Find the row and click the pencil icon in the Actions column (callout 3). -
2
Change and update
The panel opens as Edit Class with the current values filled in. Change what you need and click Update Class.
Deactivating instead of deleting
Delete class
-
1
Click the bin
Click the red bin icon in the Actions column (callout 4). -
2
Confirm
Your browser asks you to confirm. Click OK to delete or Cancel to keep it.
Deleting is permanent
Set up a class: shifts, sections and subjects
A new class is not ready for students until it has a shift, a section and its subjects. Work through these three pages in this order. They need the class management → manage permission.
1. Manage Shift
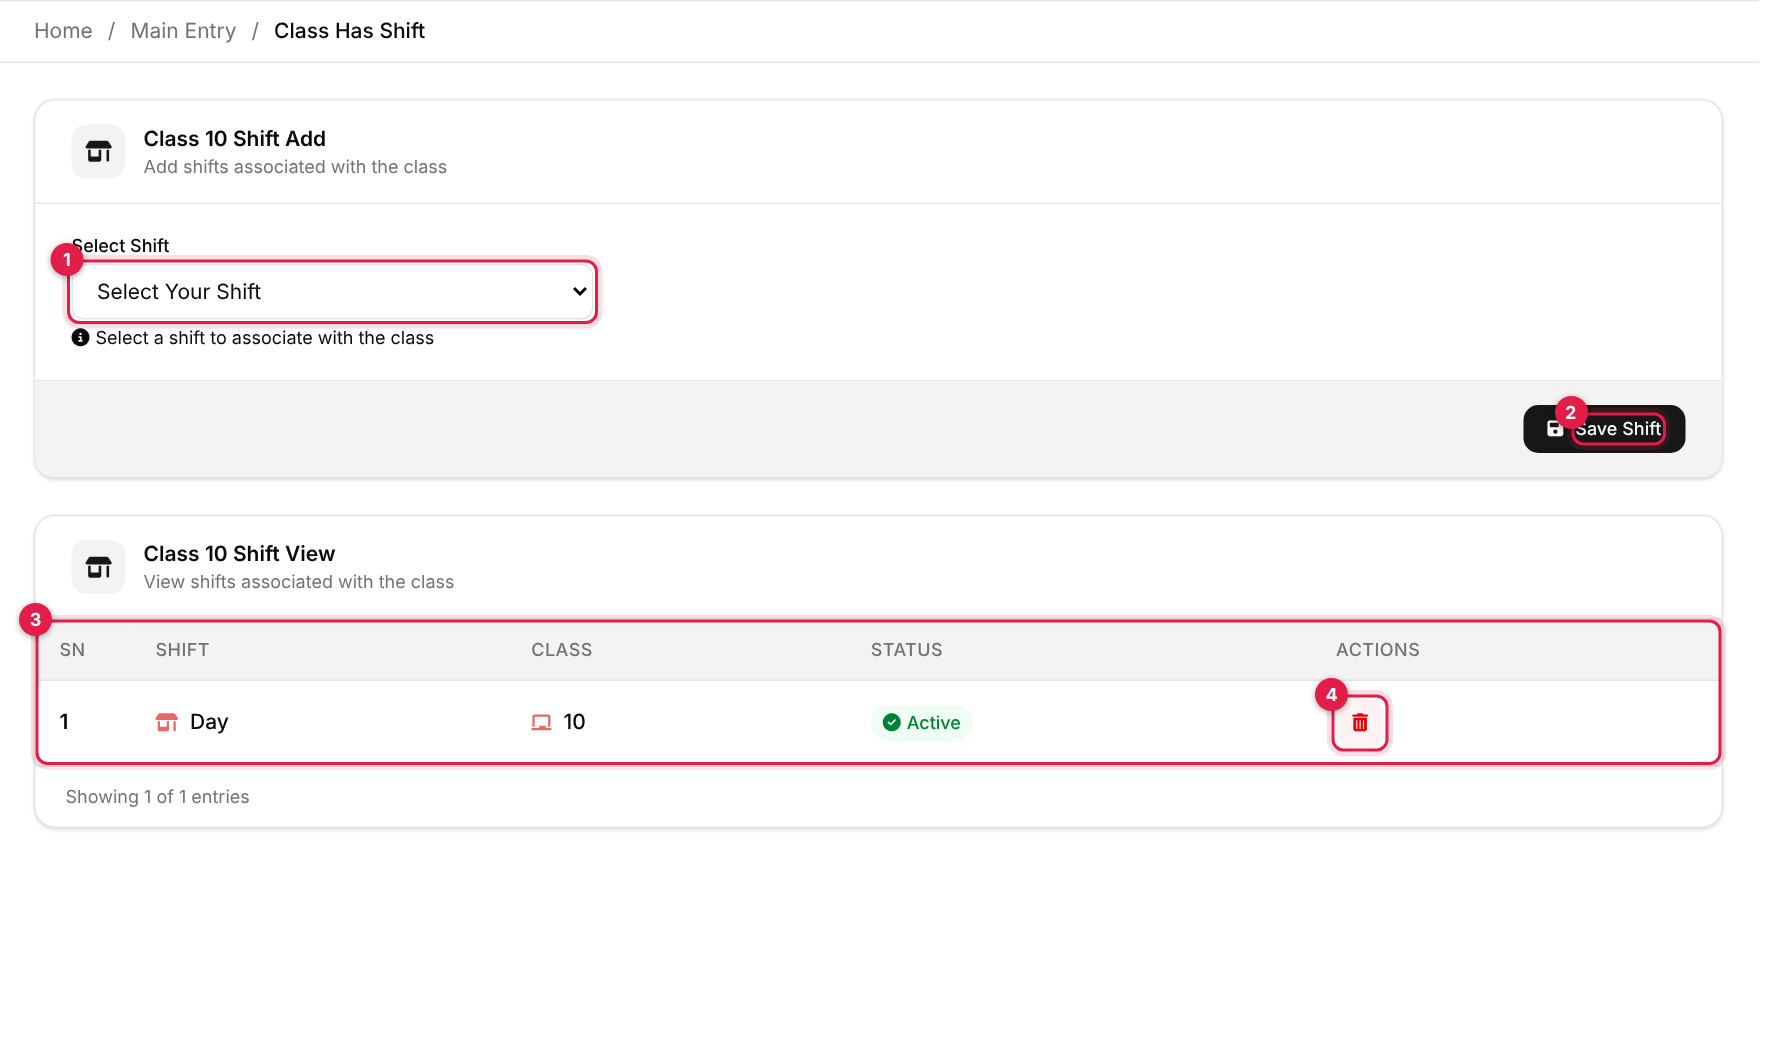
Tells the system which shifts this class runs in. Click the Manage Shift icon (callout 8) on the class row.
-
1
Choose a shift
Open Select Shift (1). It only lists Active shifts of type Regular Class. -
2
Save
Click Save Shift (2). The shift appears in the table below (3). -
3
Remove a link (optional)
Use the bin (4) to detach a shift. You are asked to confirm. If the shift is already linked to the class you get Data already taken for the class!.
2. Manage Section
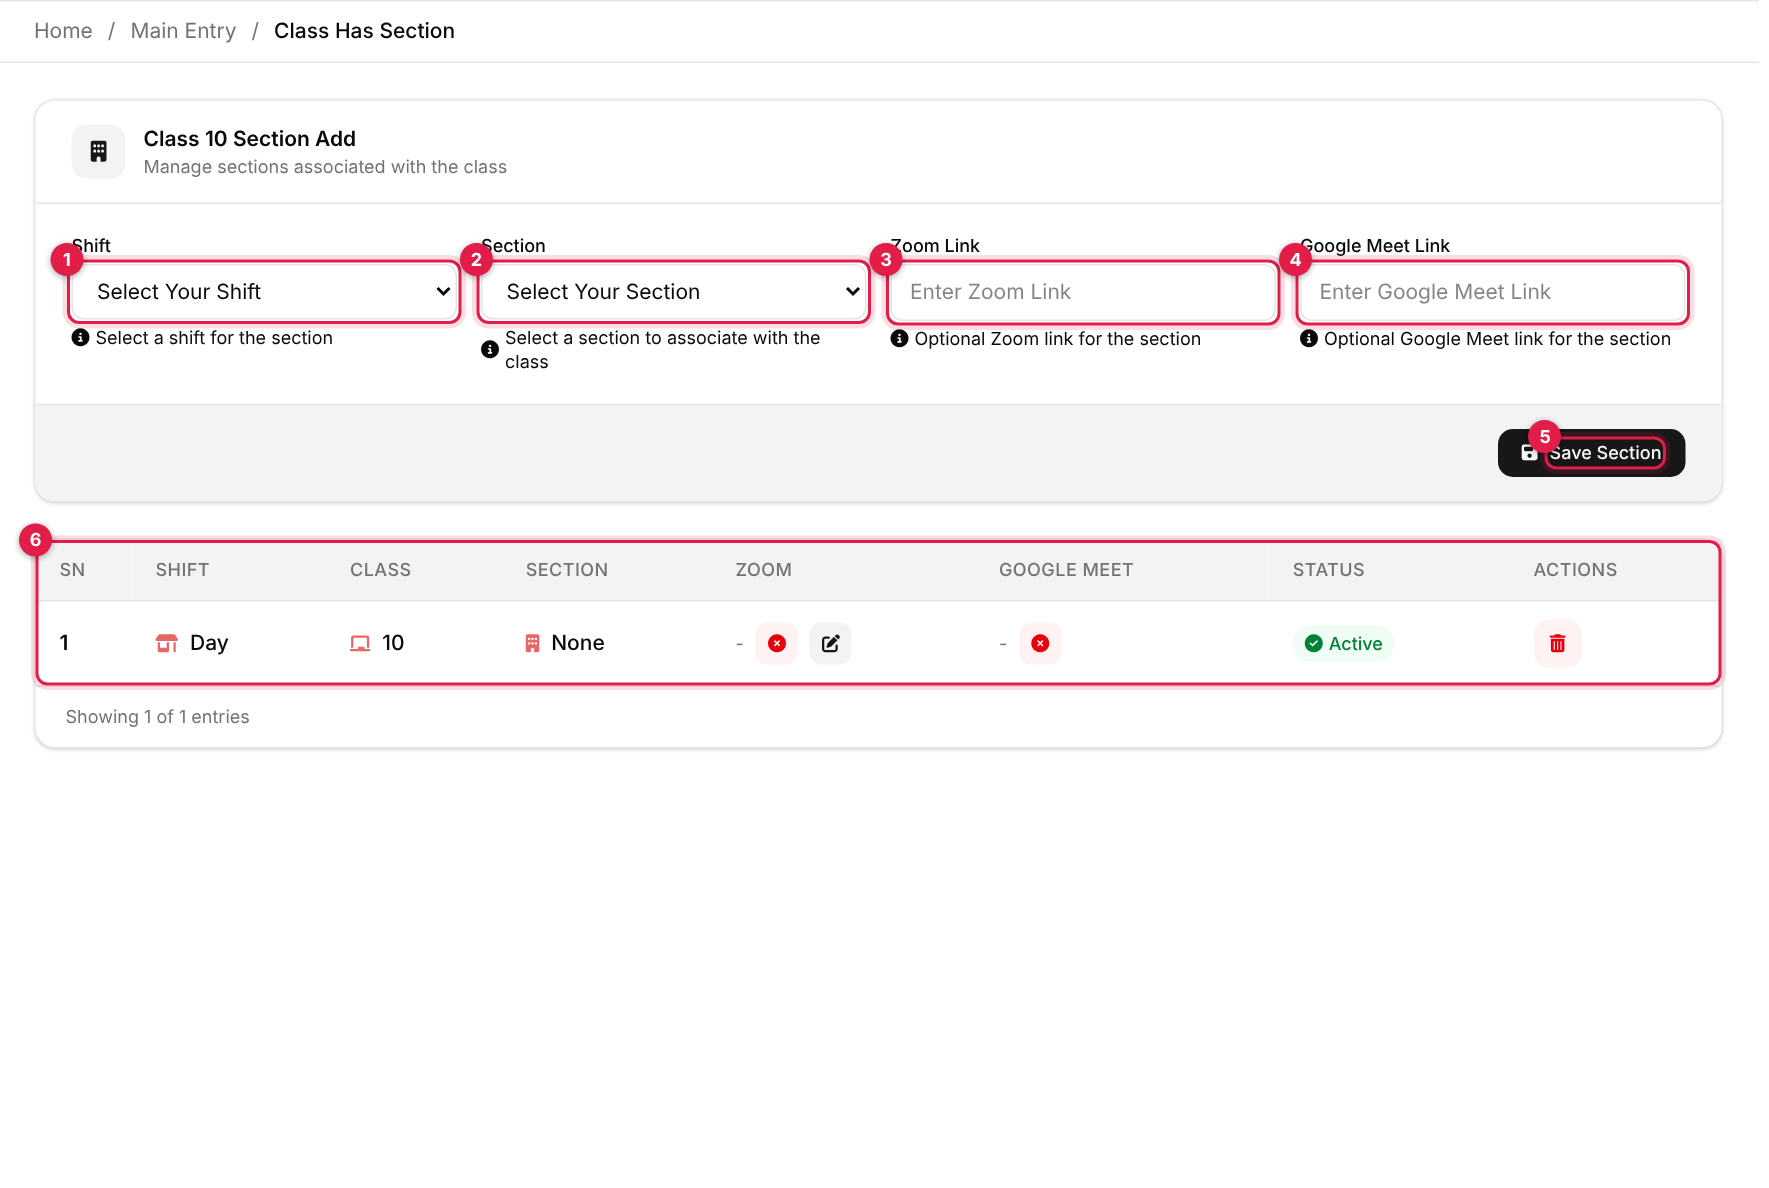
Attaches a section to the class within one of its shifts, and optionally stores online-class links. Click the Manage Section icon (callout 9).
| # | Field | Required | What to enter |
|---|---|---|---|
| 1 | Shift | Yes | Only the shifts you attached in step 1 (and that are active) are listed. |
| 2 | Section | Yes | Only Active sections from Main Entry → Section. |
| 3 | Zoom Link | No | Optional Zoom meeting link for this class section. |
| 4 | Google Meet Link | No | Optional Google Meet link. |
| 5 | Save Section | Adds the shift + section pair to the class. | |
| 6 | Table | Each row is one class + shift + section. The pencil next to Zoom edits the link, the check/cross toggles it on or off, and the bin removes the row. |
Only the first 5 rows are shown
3. Subjects
Click the class name (callout 4) to open that class's subjects. Each row links the class to a subject from the master Subjects list and sets its marks details.
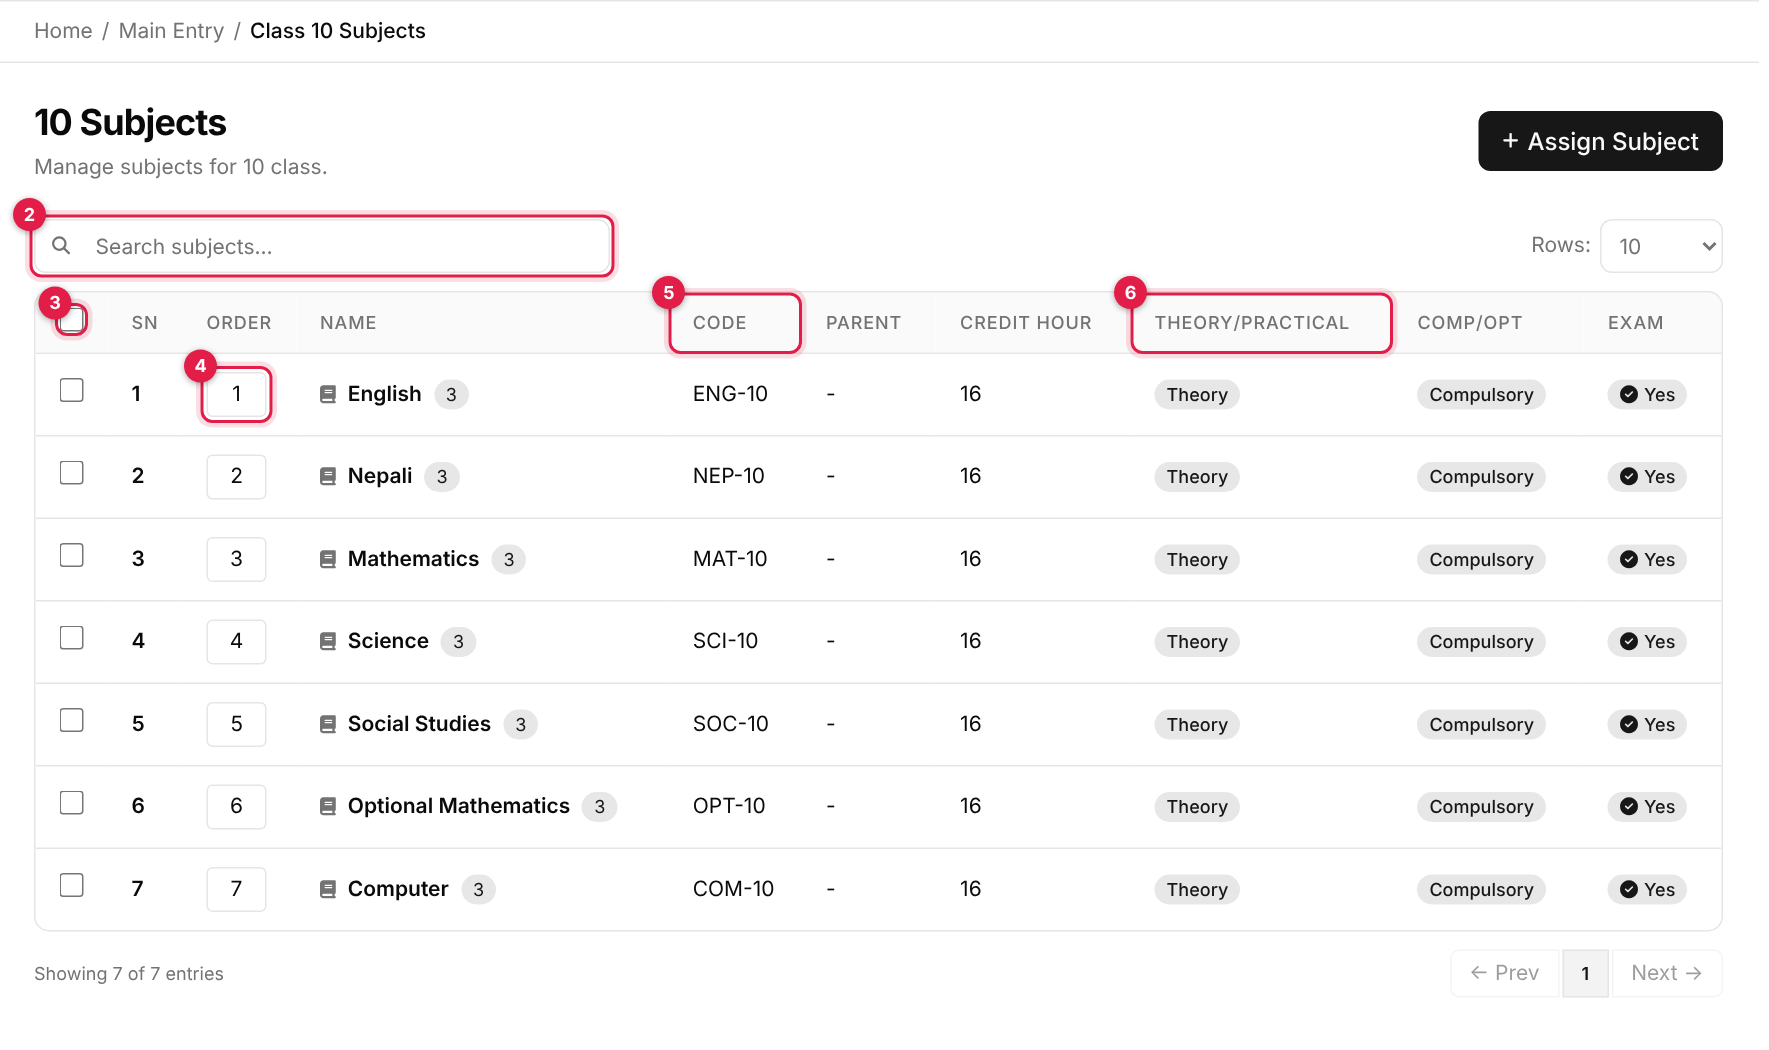
- 1Assign Subject opens the form.
- 2Search filters the subjects in this class.
- 3Select all ticks every row so you can assign formative assessments in bulk.
- 4Order: type a new number and press Tab or Enter to change where the subject appears.
- 5Code: the unique subject code in this class.
- 6Theory/Practical: how the subject is taught. Scroll the table sideways for Exam, Formative Assessment, Status and Actions.
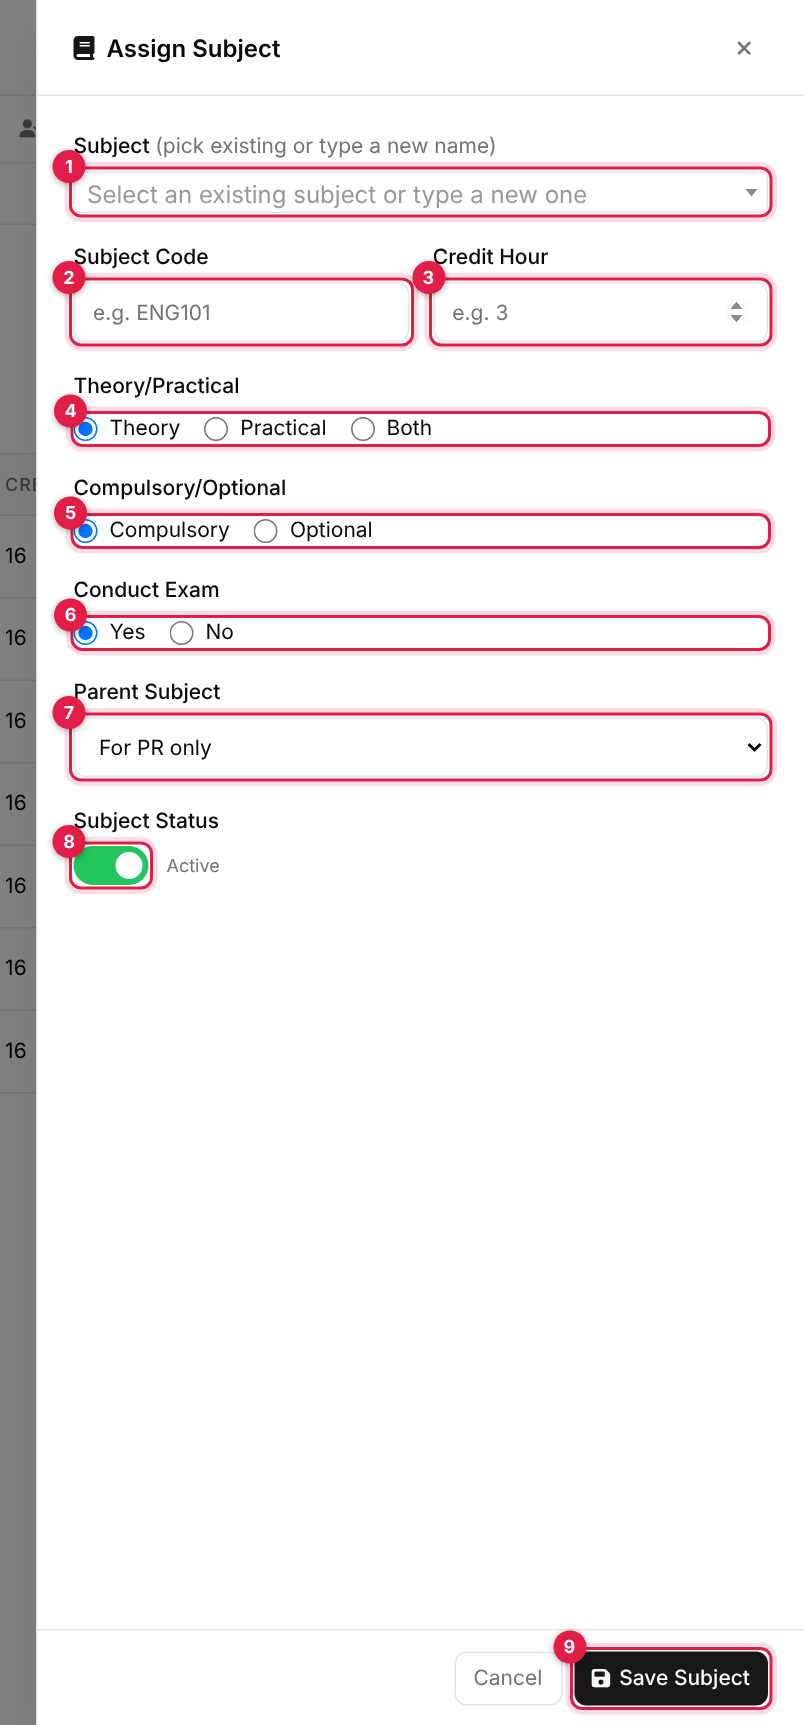
| # | Field | Required | What to enter |
|---|---|---|---|
| 1 | Subject | Yes | Pick an existing subject, or type a new name and it is added to the master list. Subjects already in this class are greyed out. |
| 2 | Subject Code | Yes | Filled in for you (first three letters of the subject, a dash, first three of the class). You can change it. It must be unique inside the class. |
| 3 | Credit Hour | Yes | Number of credit hours, for example 3 (steps of 0.5). |
| 4 | Theory/Practical | Yes | Theory (default), Practical or Both. |
| 5 | Compulsory/Optional | Yes | Compulsory (default) or Optional. |
| 6 | Conduct Exam | Yes | Yes (default) if the subject has an exam, No if not. |
| 7 | Parent Subject | No | For PR only by default; otherwise one of this class's theory subjects. |
| 8 | Subject Status | No | On (default) = active. |
Deleting a class subject
Good to know
Class number limit
What a class needs before students can join
Messages you may see
| Message | What it means |
|---|---|
| <name> created successfully! | The record was added. |
| <name> updated successfully! | Your changes were saved. |
| <name> deleted successfully! | The record was removed. |
| Class could not be deleted! Please refresh your page and try again. | The delete was refused. |
| The slug has already been taken. | A record with the same name already exists. Names are compared ignoring capitals, spaces and punctuation, so Grade 1, grade 1 and Grade-1 count as the same. |
| An error occurred. Please try again. | The save or delete was refused, for example because the record is still in use elsewhere. |