Subjects
The school's master list of subject names, shared by every class.
The Subjects list holds each subject name once. When you assign subjects to a class you pick from this list, so Mathematics is the same subject in every class that uses it.
Where it is used
- Class → subject assignment (marks, exams, homework and teachers all follow it)
Before you start
- You do not have to fill this list first: the class's Assign Subject form also lets you type a brand-new name, which is added here automatically.
The list page
Open Main Entry → Subjects from the sidebar, or click the Subjects card on the Main Entry dashboard.
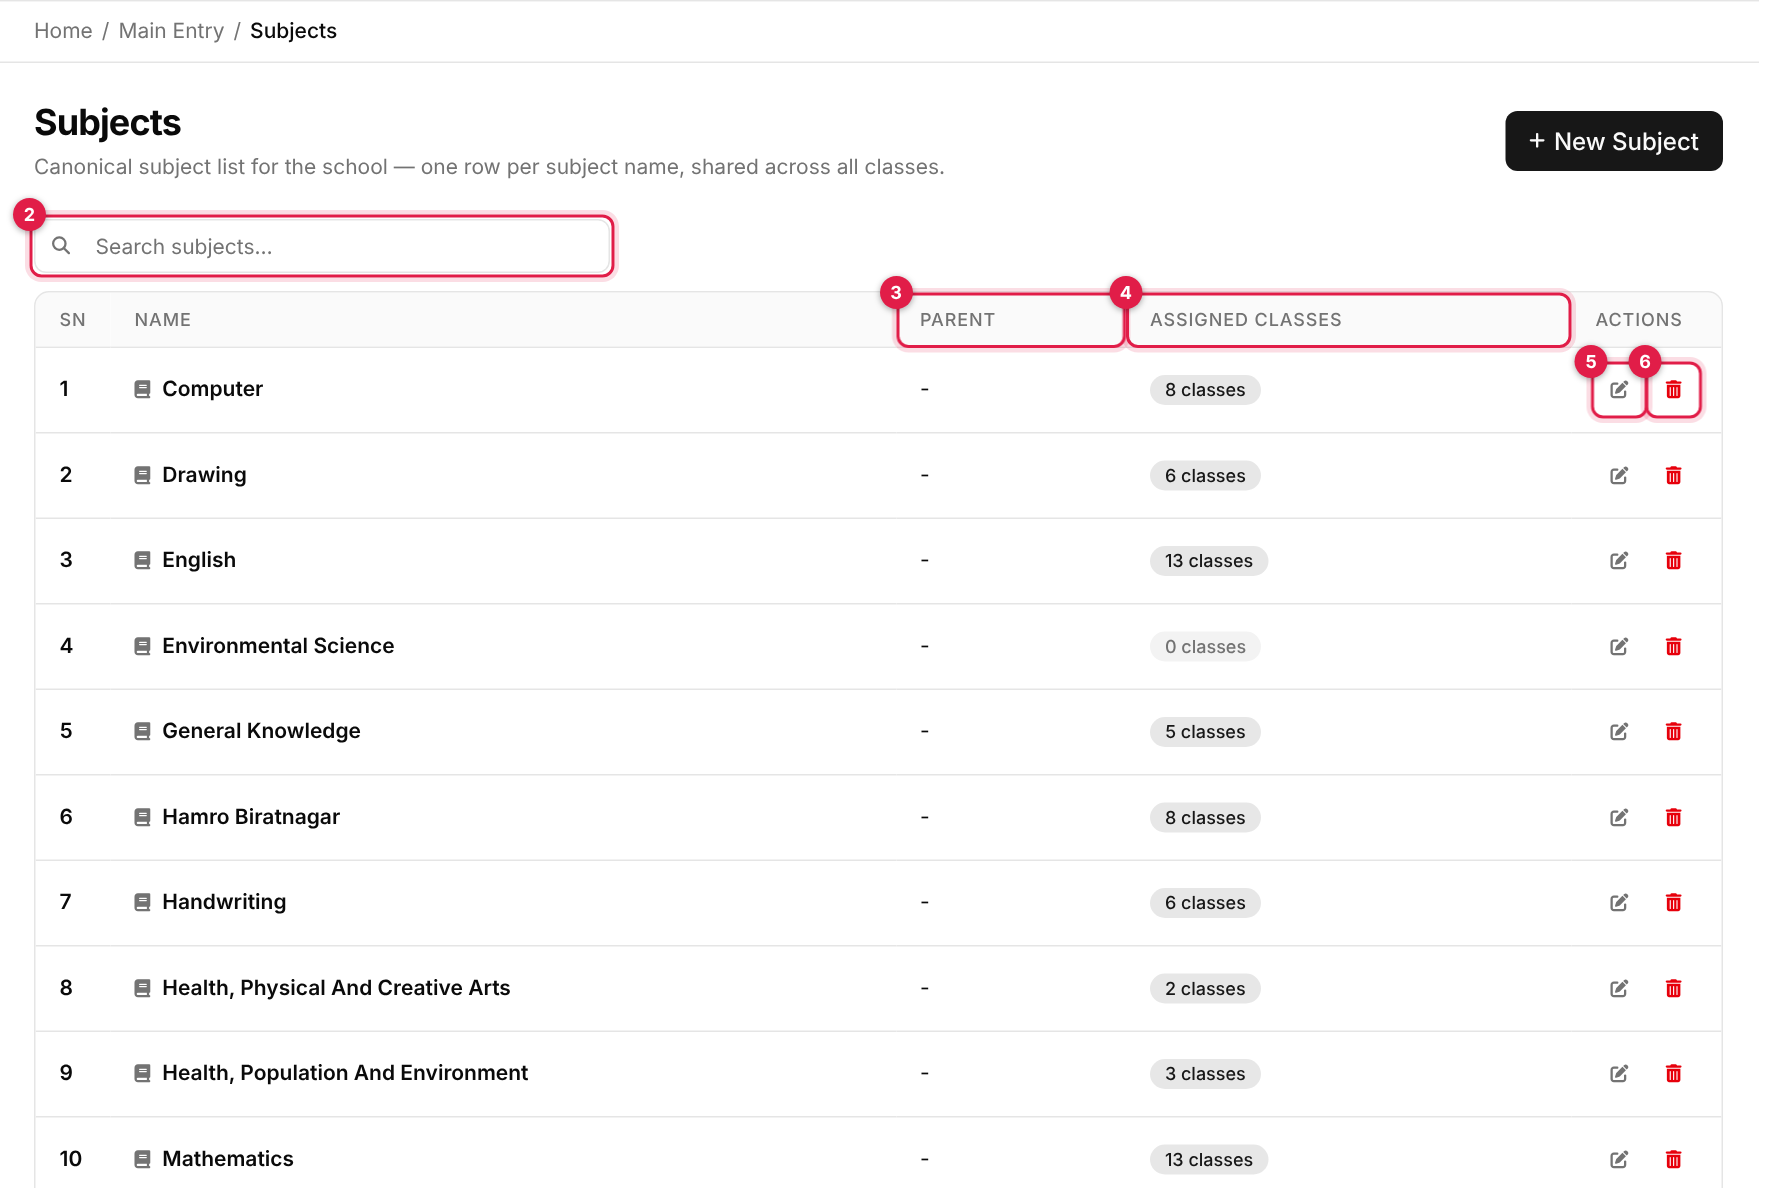
- 1New Subject opens the form.
- 2Search filters the list as you type.
- 3Parent: the parent subject, if any.
- 4Assigned Classes: how many classes use the subject.
- 5Edit (pencil).
- 6Delete (red bin).
| Column | Shows |
|---|---|
| SN | Row number. |
| Name | The subject name. |
| Parent | The parent subject, or a dash. |
| Assigned Classes | A badge such as 2 classes. |
| Actions | Edit and delete. |
Add a subject
-
1
Open the form
Click New Subject (callout 1 above). A panel slides in from the right. -
2
Fill in the details
Complete the fields below. The numbers match the callouts in the screenshot.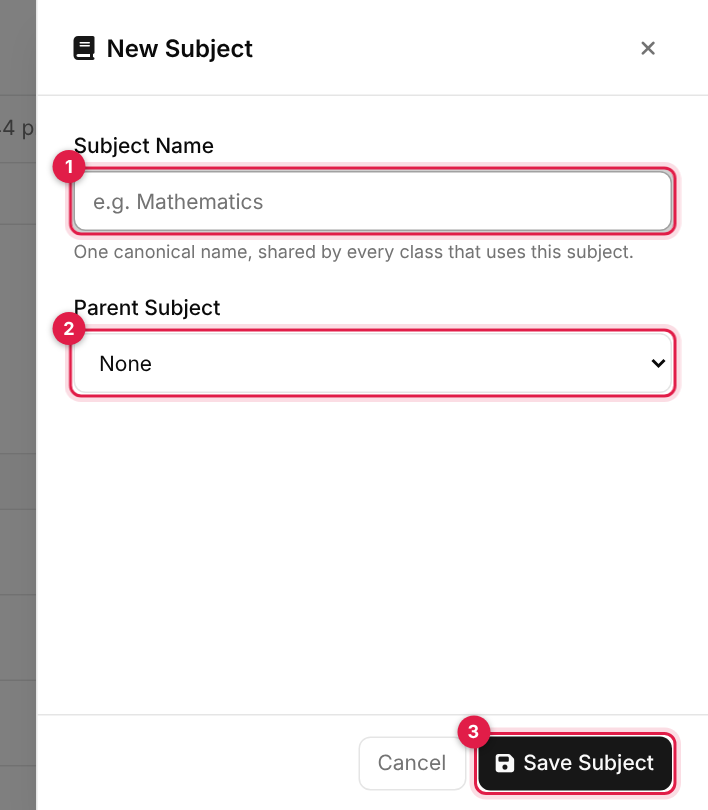
The add form for subject # Field Required What to enter 1 Subject Name Yes One name, at least 2 characters, for example Mathematics. It cannot repeat an existing name (capitals ignored).2 Parent Subject No Choose another subject if this one belongs under it. None by default. A subject cannot be its own parent. -
3
Save
Click Save Subject (the last callout). On success the panel closes, the list refreshes and a green Success message appears. If something is wrong, a red Error message lists the problems and the panel stays open so you can fix them. Cancel, the × or a click outside the panel closes it without saving.
Edit subject
-
1
Open the record
Find the row and click the pencil icon in the Actions column (callout 3). -
2
Change and update
The panel opens as Edit Subjects with the current values filled in. Change what you need and click Update Subject.
Deactivating instead of deleting
To retire a subject without losing history, edit it and switch Status off. It stays in the list as Inactive and drops out of the dropdowns that use it.
Delete subject
-
1
Click the bin
Click the red bin icon in the Actions column (callout 4). -
2
Confirm
Your browser asks you to confirm. Click OK to delete or Cancel to keep it.
Deleting is permanent
A subject can only be deleted when it is not assigned to any class and no other subject uses it as a parent. Otherwise you are told Cannot delete — assigned to N class(es). Remove it from those classes first.
Good to know
Permission needed
Opening this page works for everyone, but adding, editing or deleting needs the class management → manage permission. Without it you will see an access-denied page.
This page reloads
Unlike most Main Entry pages, saving here reloads the page instead of updating the list in place.
Messages you may see
| Message | What it means |
|---|---|
| Subject created successfully! | The subject was added. |
| Subject updated successfully! | Your changes were saved. |
| Subject deleted successfully! | The subject was removed. |
| A subject with this name already exists. | Names are compared ignoring capitals. |
| A subject cannot be its own parent. | Choose a different parent. |
| Cannot delete — assigned to N class(es). | Remove the subject from those classes first. |
| Cannot delete — other subjects reference this as their parent. | Change or remove the child subjects first. |